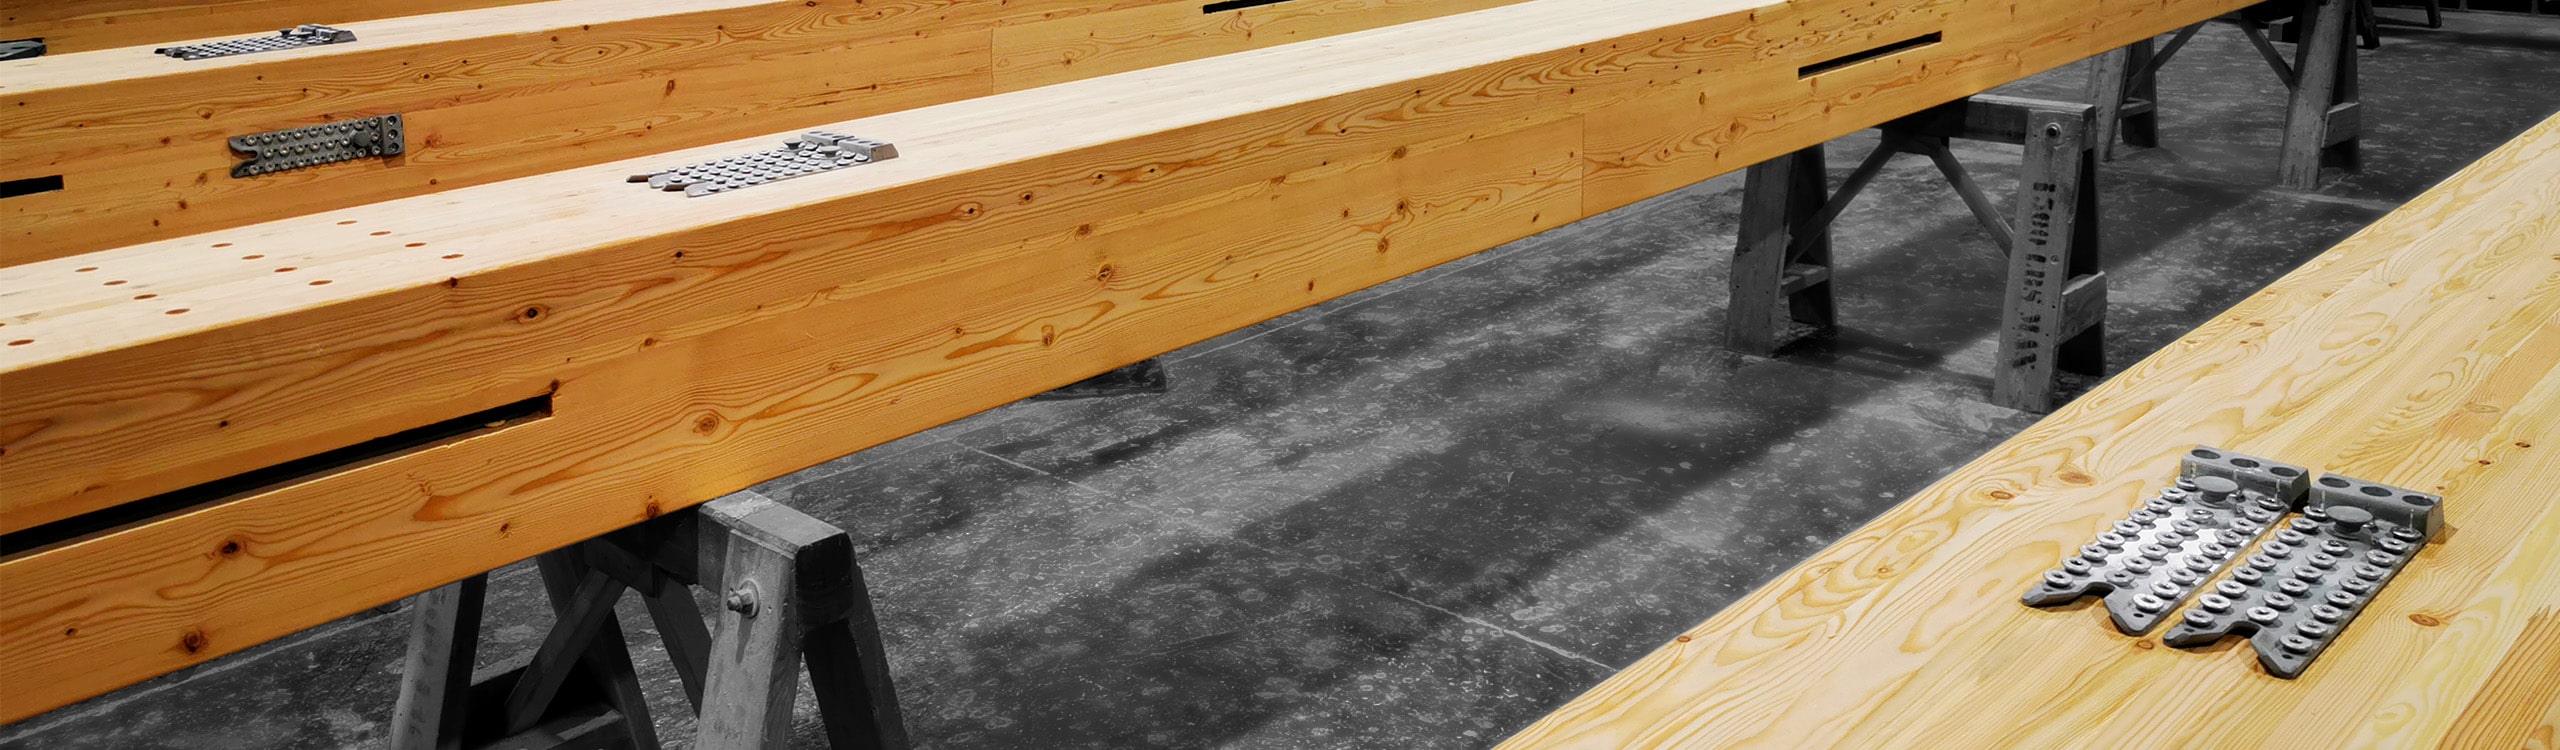
MTC Solutions’ RICON S VS series is a line of pre-engineered, concealed beam hanger systems designed for structural performance, speed of installation, and clean aesthetics in mass timber construction. Whether you’re working with glulam, CLT, or LVL, the RICON series offers a dependable, ICC-ES Certified connection tested in a wide variety of scenarios—including axial loading, fire, and seismic performances.
This article gives you the complete rundown on how to install the RICON S VS family of connectors. We’ll cover general considerations for the installation, the hardware and tool necessary, installation time, and step-by-step instructions to help you speed up your mass timber connection work and make sure the quality is top-notch.
New to the RICON S VS Series and how it’s used? Read this first. 😉
Approximately 6-minute read.
Hardware & Tools, What do You Need?
Every RICON S VS connector set is delivered with:
For an accurate installation, MTC recommends using:
And the usual must-haves; PPE, a measuring tape, a framing square, and a marker.
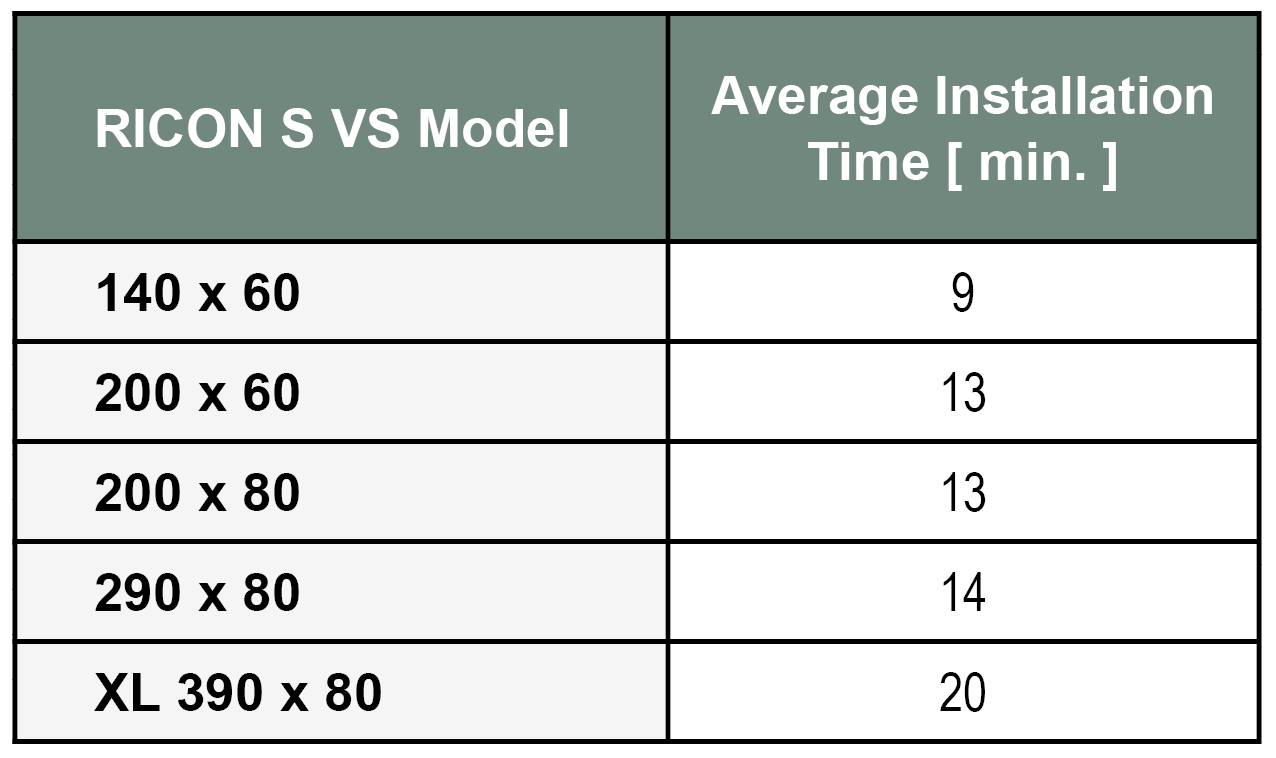
Installation Time and Time-Saving Tips
The estimated time for a single person to install a complete RICON product ranges from 9 to 20 minutes based on the model, which can be improved further with efficient practices mastered, such as predrilling, using the proper jig, and optimized beam positioning.
The installation times given in the table include:
💡 Pro tips for a faster installation process:
Step-by-Step Installation Instructions
Before diving into the step-by-step installation process of the RICON series—especially if you are not familiar with MTC Solutions fastener technology—we recommended you read through our STS installation best practices article that details how to optimize your installation.
Now, let’s dive in!
1. RICON plates layout and reference points
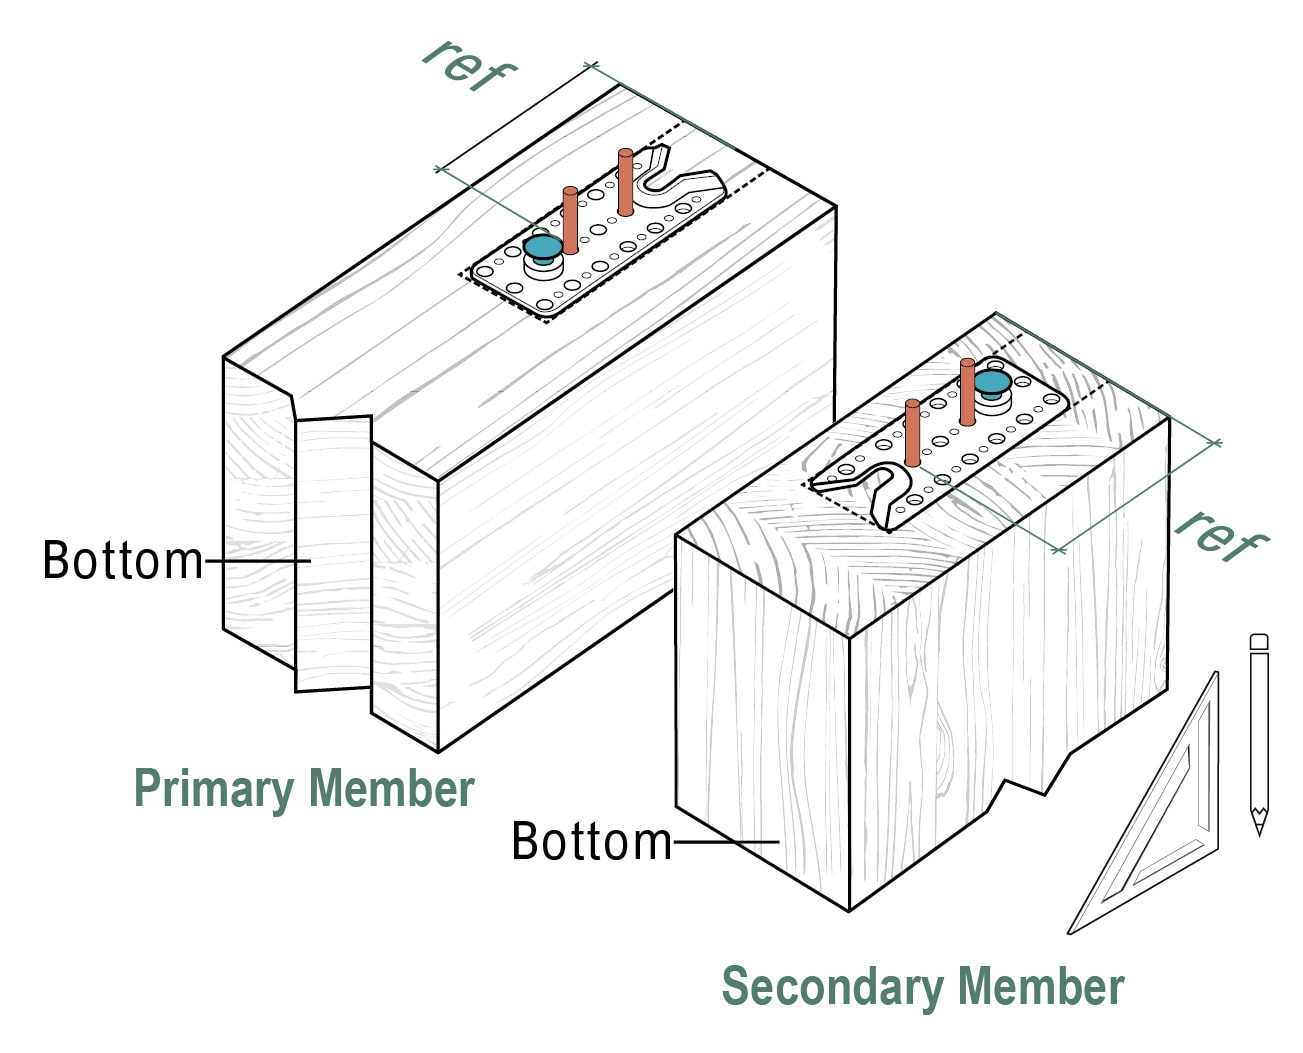
The RICON’s point of reference is the top of the beam. The lower structural positioning screw should be measured from that point of reference.
The connector plates should be oriented with the collar bolt of the RICON at the bottom on the primary member and on the top on the secondary member.
💡 Pro tip for a smoother process:
Design the housing depth to allow tolerance at the beam-to-column interface—this facilitates smooth drop-in placement. For more details, refer to the RICON S VS detailing section in the MTC Beam Hanger Design Guide.
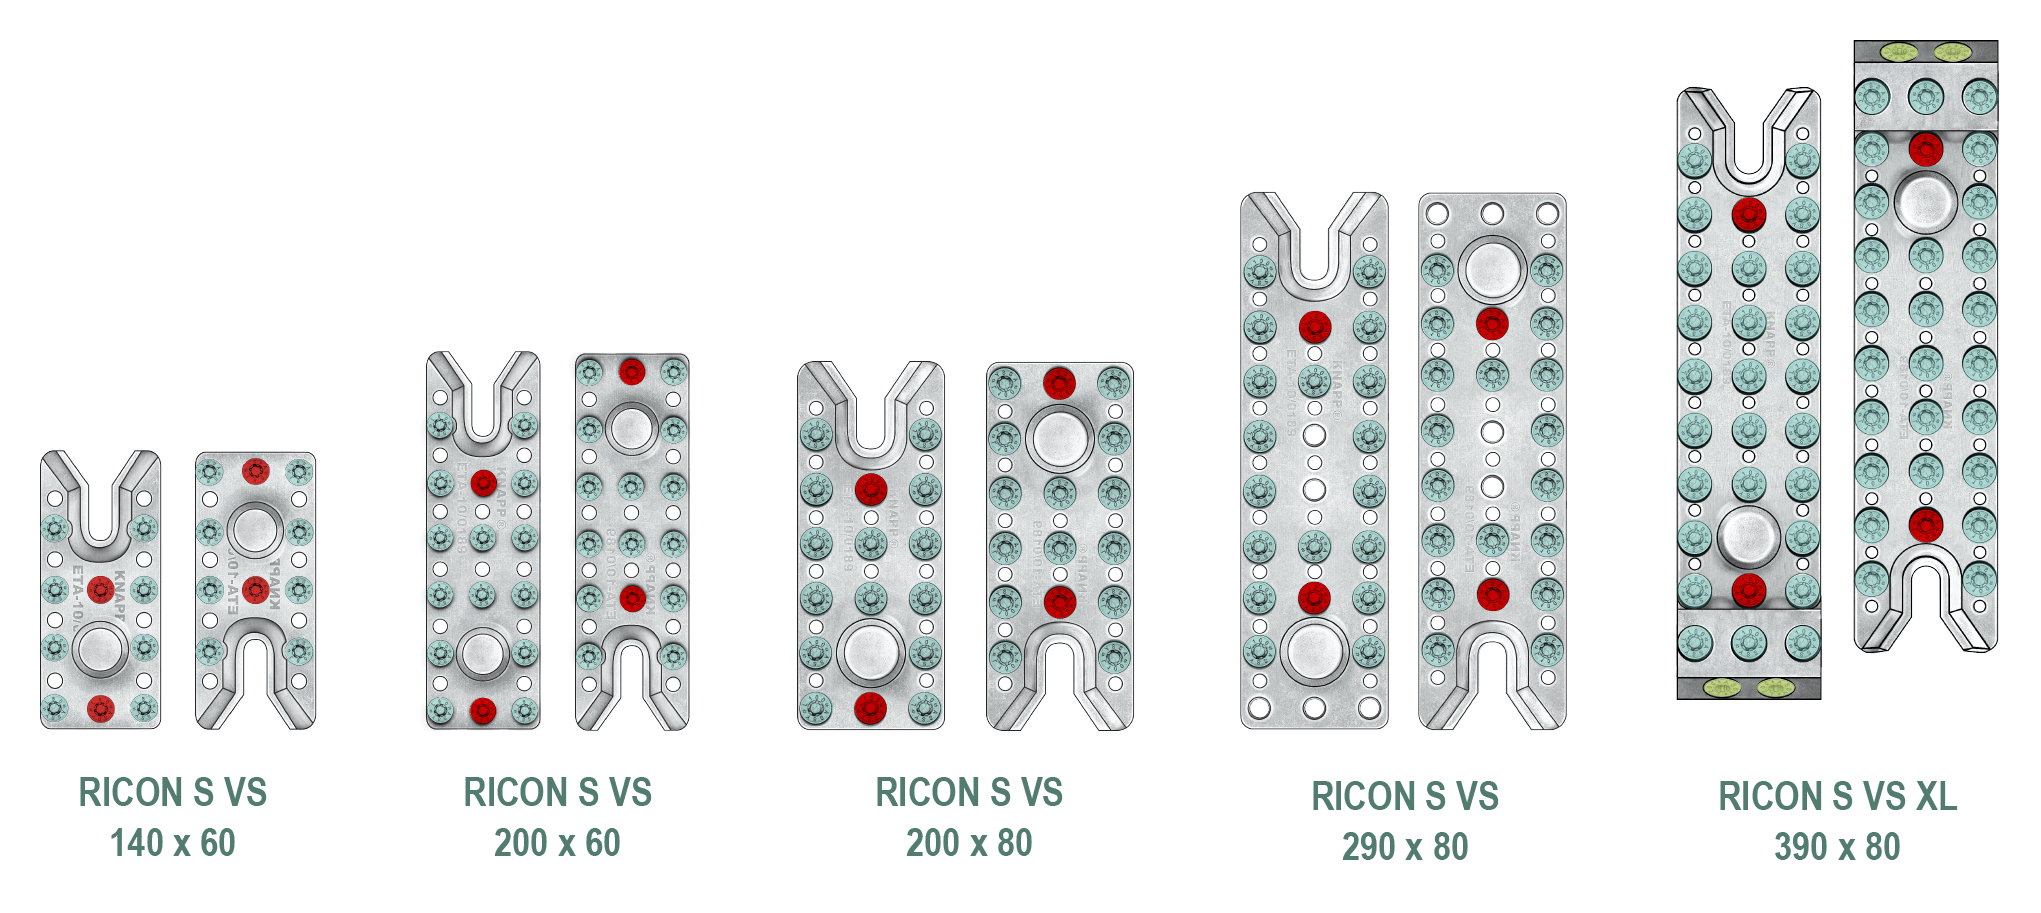
2. Structural Positioning Screws
The first screws to install should be the two structural positioning screws which will hold the connector in place during the fastening of the remaining fasteners. Below is a visual diagram indicating STS positioning across the RICON S VS product family.
Refer to the red dots to know which screws correspond to the structural positioning screws.
💡 Pro tip: predrilling pilot holes
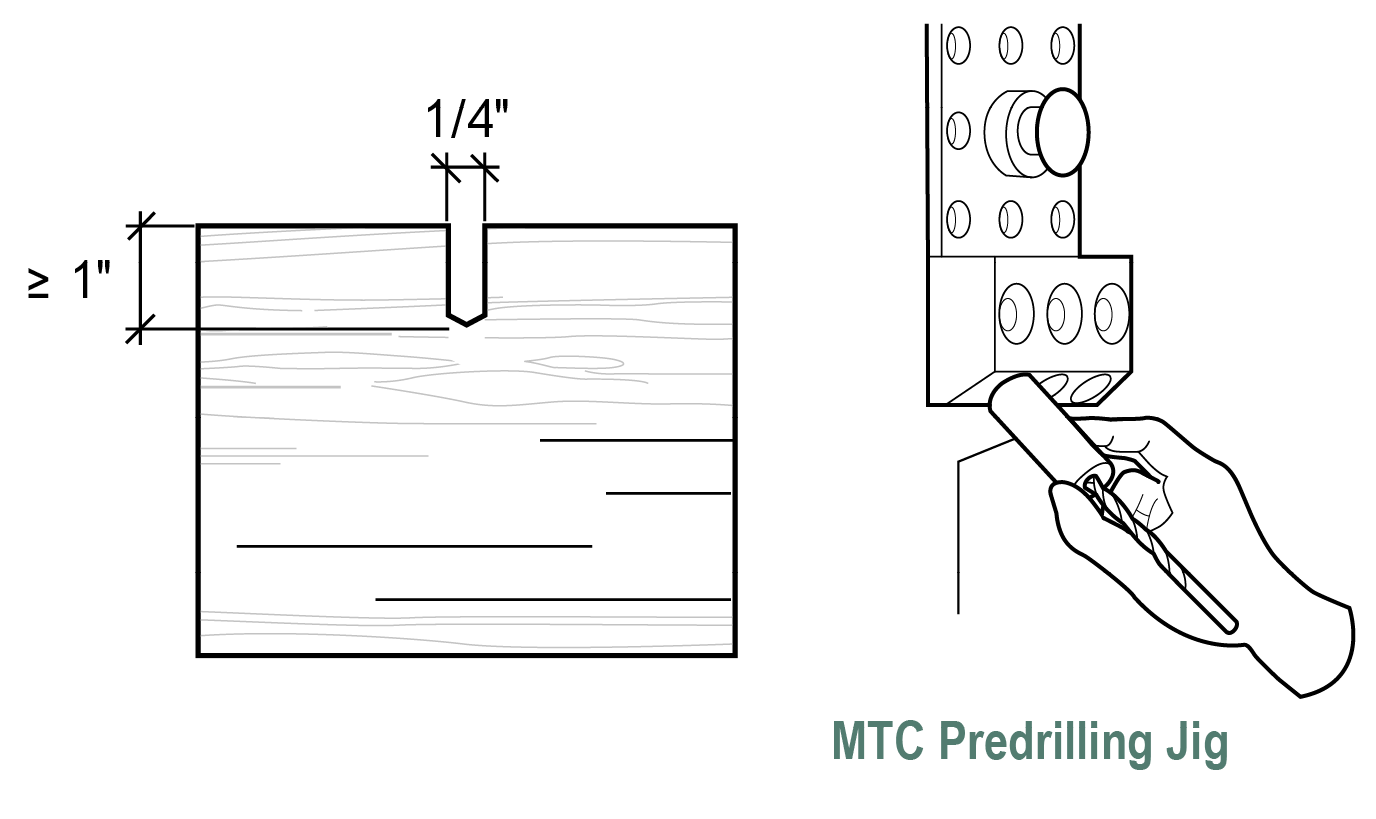
While optional for STS installation, pilot holes:
Hence, it is recommended to integrate that step as part of your installation process before proceeding with fastener drive to increase effectiveness, particularly for multiple, repetitive, installations. For the structural fasteners used with the RICON S VS series, the following pilot hole dimensions are recommended:
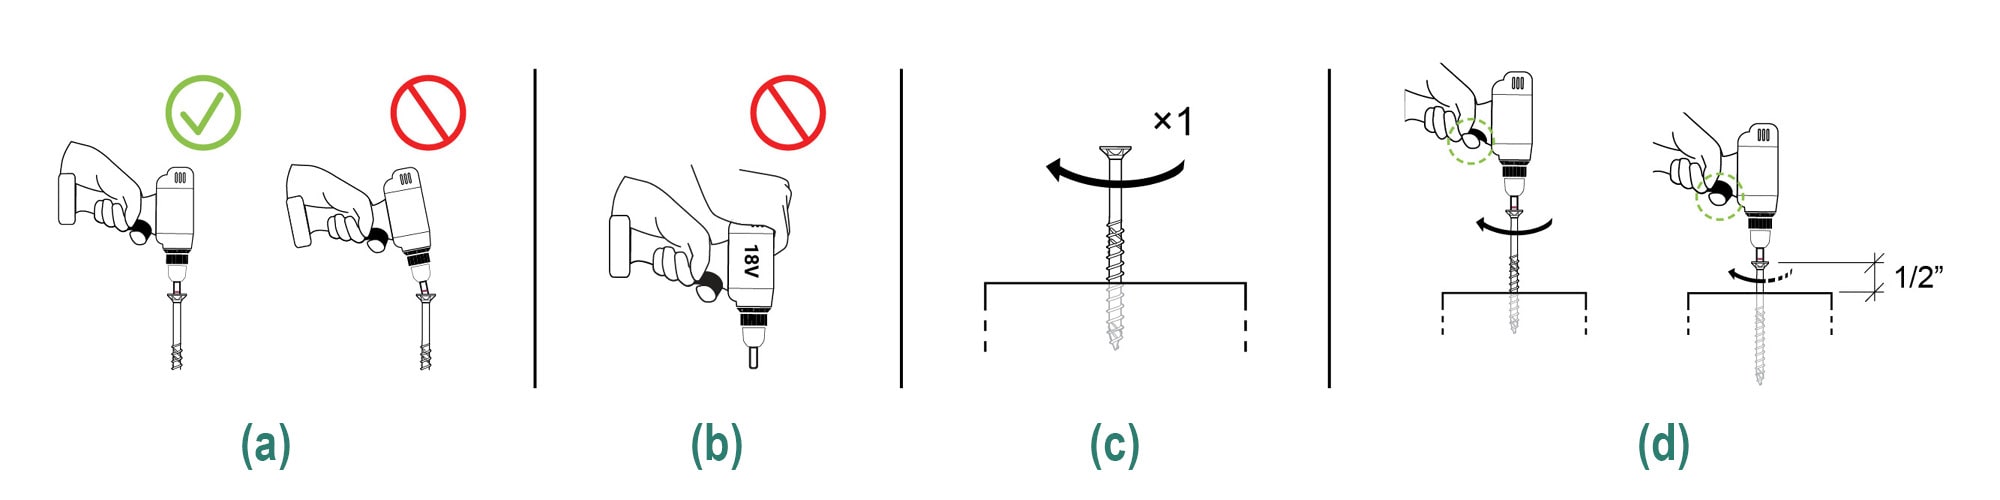
3. Install VG CSK Screws
For an optimized installation process, we recommend that each screw is installed considering the following best practices:
Why Do Builders Trust the RICON S VS Series?
From the compact 140 × 60 to the heavy-duty XL 390 × 80, the RICON family provides:
Together, these features support fast, clean, and code-compliant installations across a wide range of mass timber projects.
More of a visual learner? Check out this video of a RICON XL installation:
The RICON S VS connectors are more than just a connection—they’re a solution. Whether it’s a high-visibility architectural install or a repeatable prefab workflow, the RICON delivers strength, simplicity, and speed.
And you’re not alone—our team of engineers and timber experts are here to help. Need layout tables, CAD files, or fire-rated options? Tap into our Resource Hub or Contact Us today! Let’s build something great together. 😉
Register for a Technical Learning Session
Sign up for MTC Newsletter and keep up to date with all our progress.