
MTC Solutions’ GIGANT series is a line of pre-engineered concealed beam hanger systems designed for structural performance, speed of installation, and clean aesthetics in timber framing, log home building, and mass timber construction.
This article gives you the complete rundown on how to install the GIGANT family of connectors. We’ll cover general considerations for the installation, the hardware and tools necessary, installation time, and step-by-step instructions to help you speed up work while ensuring top-notch quality.
New to designing wood structures and mass timber post-to-beam connections? Read this first to learn more about beam hanger systems. 😉
Approximately 4-minute read.
Hardware & Tools, What Do You Need?
Every GIGANT connector set is delivered with:
For an accurate installation, MTC recommends using:
And the usual must-haves: PPE, a measuring tape, a framing square and a marker.
Installation Time and Time-Saving Tips
The estimated time for a single person to install a complete GIGANT system takes less than five minutes! This can be further improved by mastering efficient practices.
A breakdown of the total installation times given in the table includes:
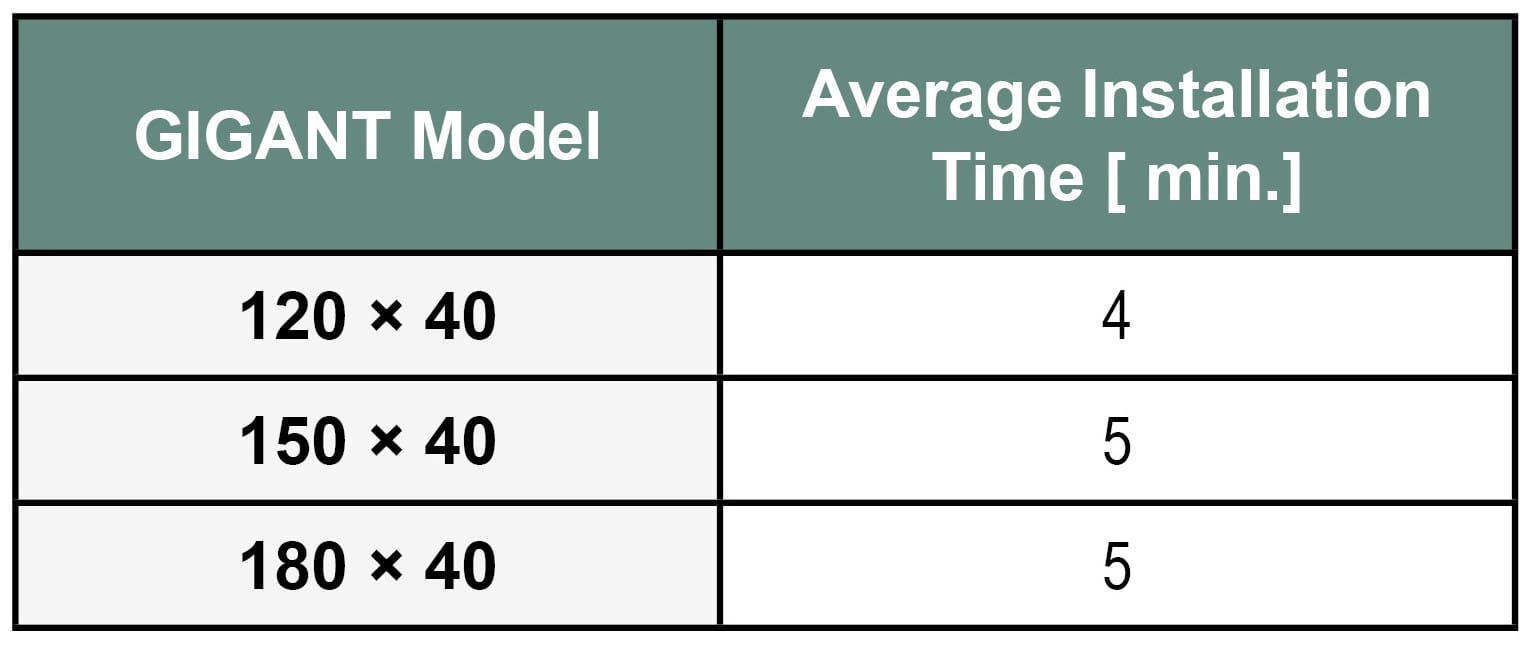
Table 1. GIGANT estimated installation time
💡 Pro tips for a faster installation process:
Step-by-Step Installation Instructions
Before looking into the step-by-step installation process of the GIGANT series, and especially if you are not familiar with MTC Solutions fastener technology, we recommended you read through our STS installation best practices article that details how to optimize your installation.
Now, let’s dive in!
1. GIGANT plate layout and reference points
The GIGANT’s point of reference is the top of the beam. The lower structural positioning screw should be measured from that point of reference.
The connector plates on the primary member should be oriented with the GIGANT hooks pointing upwards, and on the secondary member with the GIGANT hooks pointing downwards.
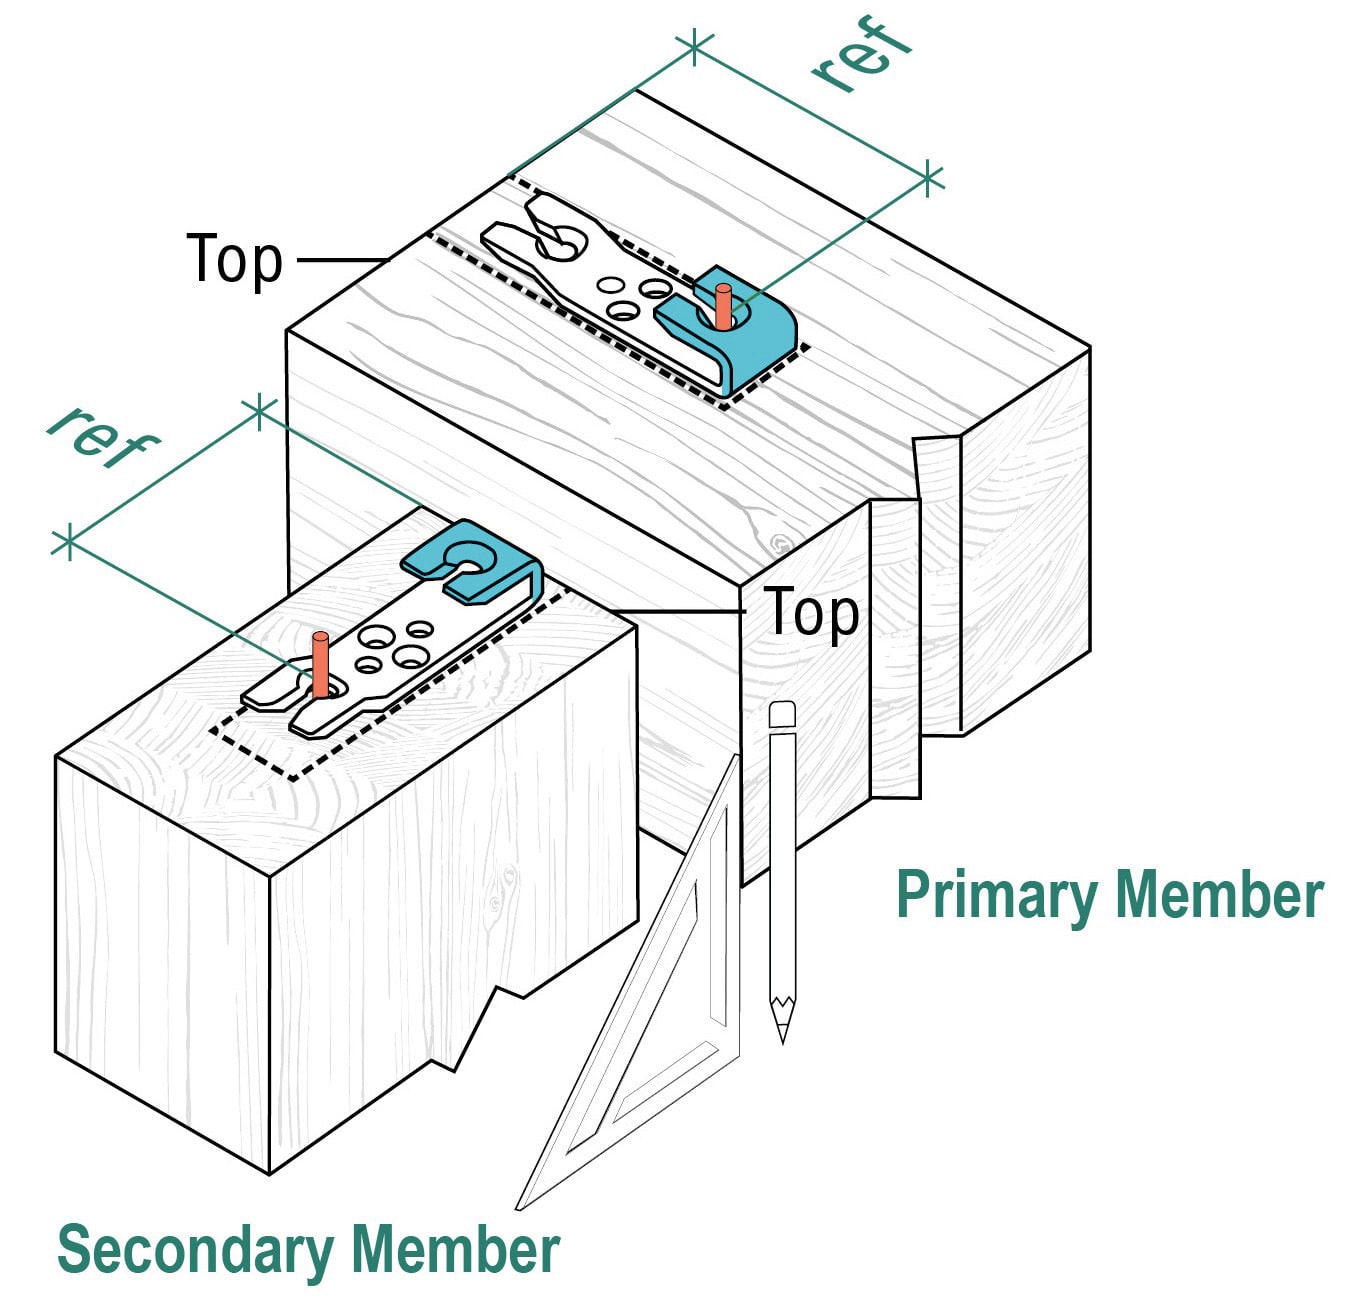
Figure 2. GIGANT layout reference points
💡 Pro tips for a smoother process:
2. Structural Positioning Screws
Refer to the red dots to know which screws correspond to the structural positioning screws.
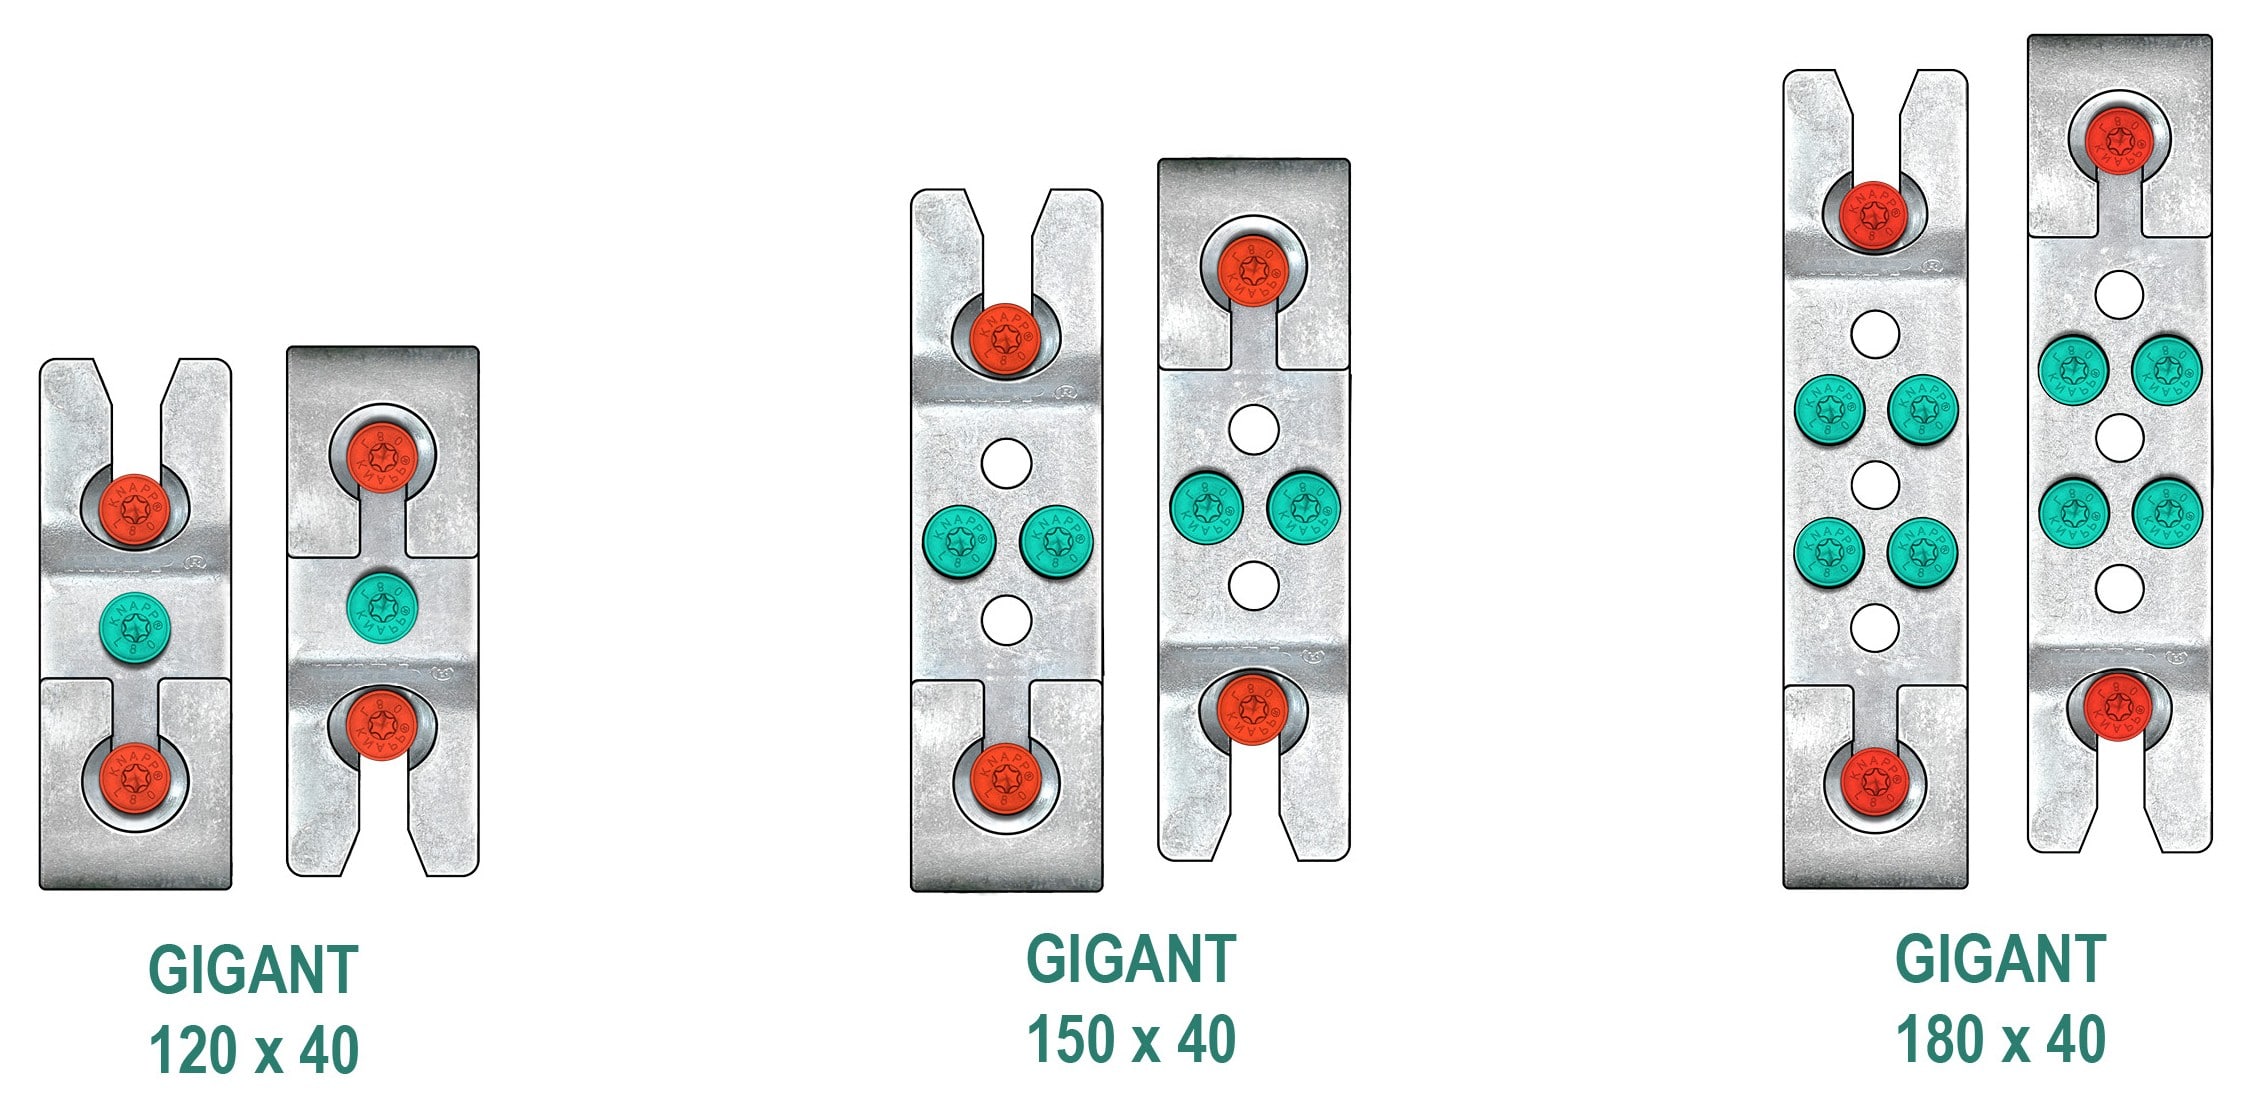
Figure 3. GIGANT screw patterns
Legend:
● Structural Positioning Screws (without Clip Lock)
● Horizontal Screws
For an optimized installation process, we recommend that each screw is installed considering the following best practices:
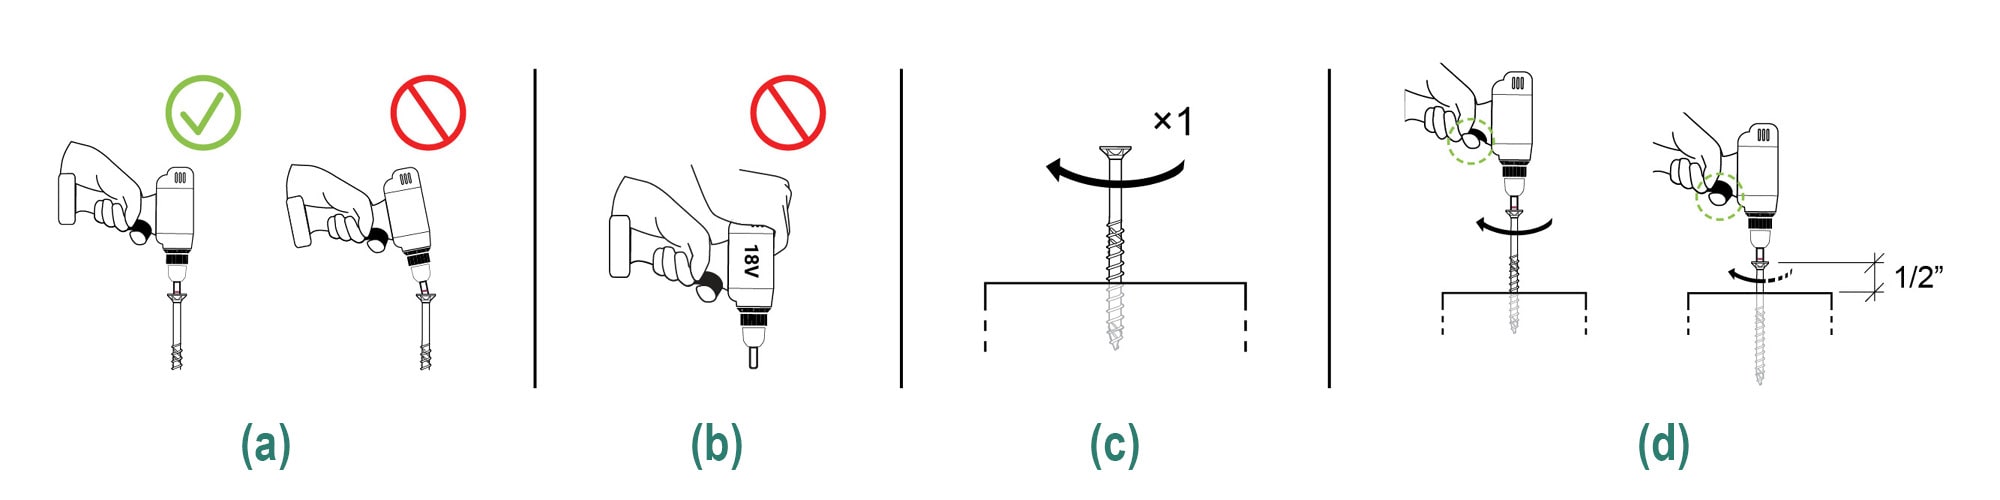
Figure 4. Screw installation best practices
And that’s it! Efficient and simple.
The GIGANT connectors are smaller in size than RICON S VS and MEGANT hangers. When smaller loads need supporting, the GIGANT connectors will suit your needs while still providing a clean, architecturally aesthetic finish.
And you’re not alone—our team of engineers and timber experts are here to help. Need layout tables, CAD files, or fire-rated options? Tap into our Resource Hub or Contact Us today! Let’s build something great together. 😉
Register for a Technical Learning Session
Sign up for MTC Newsletter and keep up to date with all our progress.