Safety and efficiency are key to successful rigging. To avoid issues and keep operations running smoothly, proper checks are essential at every stage of a lift. Whether you are just starting and want to learn the basics effectively, or you are a veteran looking for new tips to enhance your workflow, this quick guide has you covered. Read on to discover the critical steps you can easily follow to ensure a worry-free rigging process. Also, be sure to check out our Rigging Design Guide for more information.
Approximately 5-minute reading time.
MTC Solutions rigging devices are designed for use with our self-tapping screws and RW driver bit, following the installation procedures outlined in our Rigging Design Guide and previous article, “What Are the Essential Tools for Rigging Device Installation?.” The capacity and safety of these anchors cannot be guaranteed if there are any deviations in hardware or installation.
A thorough hardware assessment is critical to the success of hoisting operations and the prevention of accidents. To facilitate this process, we recommend the easy-to-follow steps outlined below. The assessment must be performed by a qualified rigger and may require valid certification in some jurisdictions.
(1) Rigging Hardware
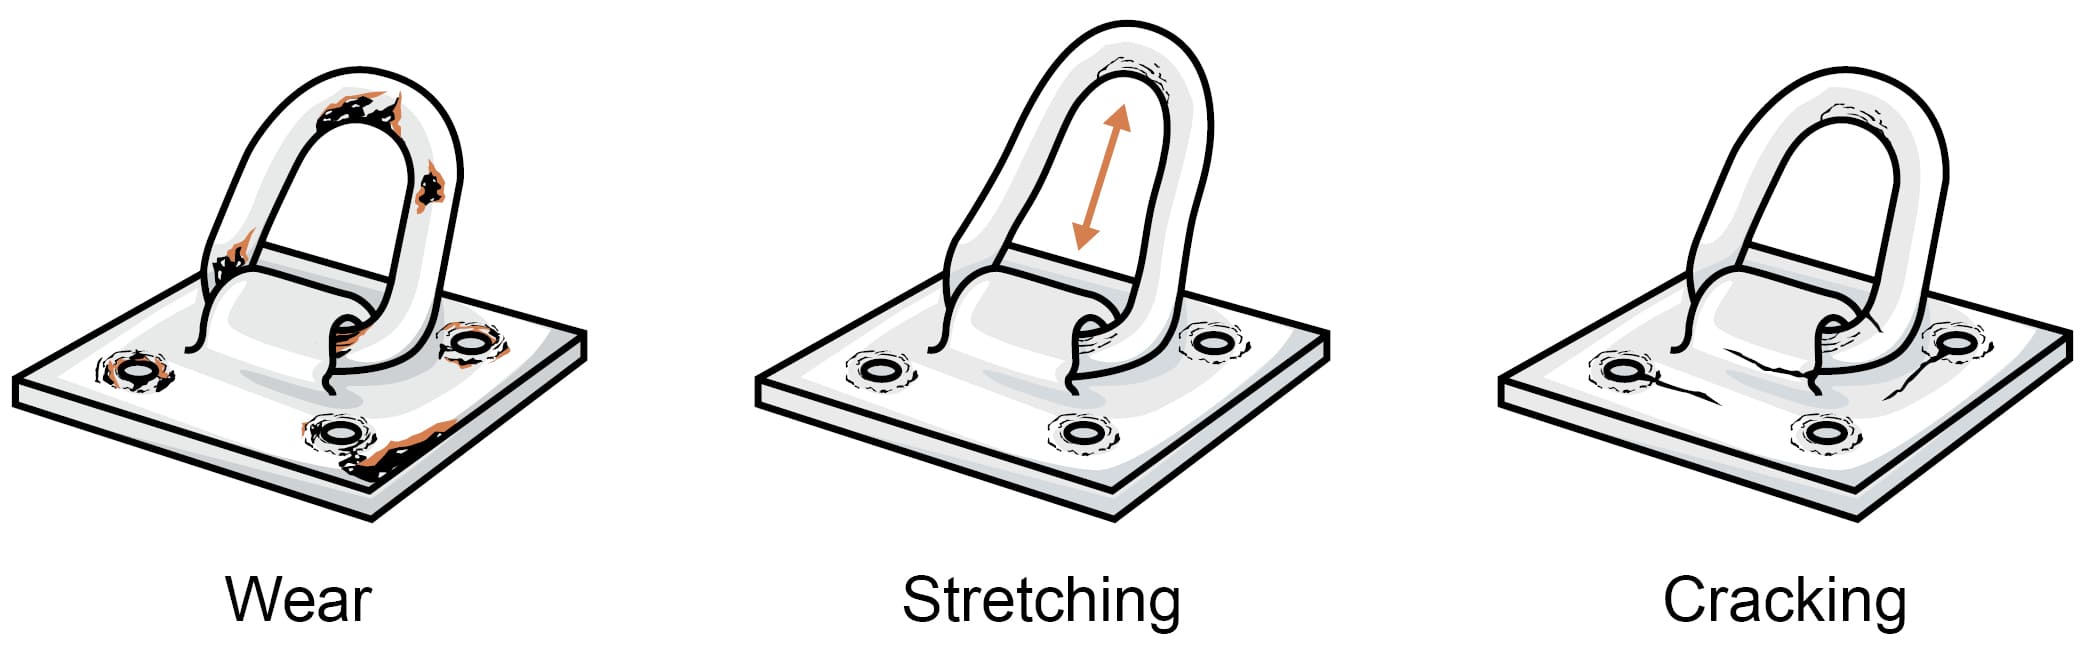
Figure 1. Possible damage to anchors over time
- Assess the anchors for visible signs of damage, including wear, stretching, and cracks. Remove the anchor from service immediately if there is damage greater than 1/16” in depth in the ring, clevis, plate, or holes.
- Ensure that only new, unused screws are used for installation. Never reuse screws that have been previously installed or used for rigging.
- Verify that all required identification markings on the anchors are present and legible.
- Ensure that the selected anchor and screws match the approved rigging design based on the load, lifting configuration, panel geometry, material properties, and other project-specific requirements.
(2) Anchor placement
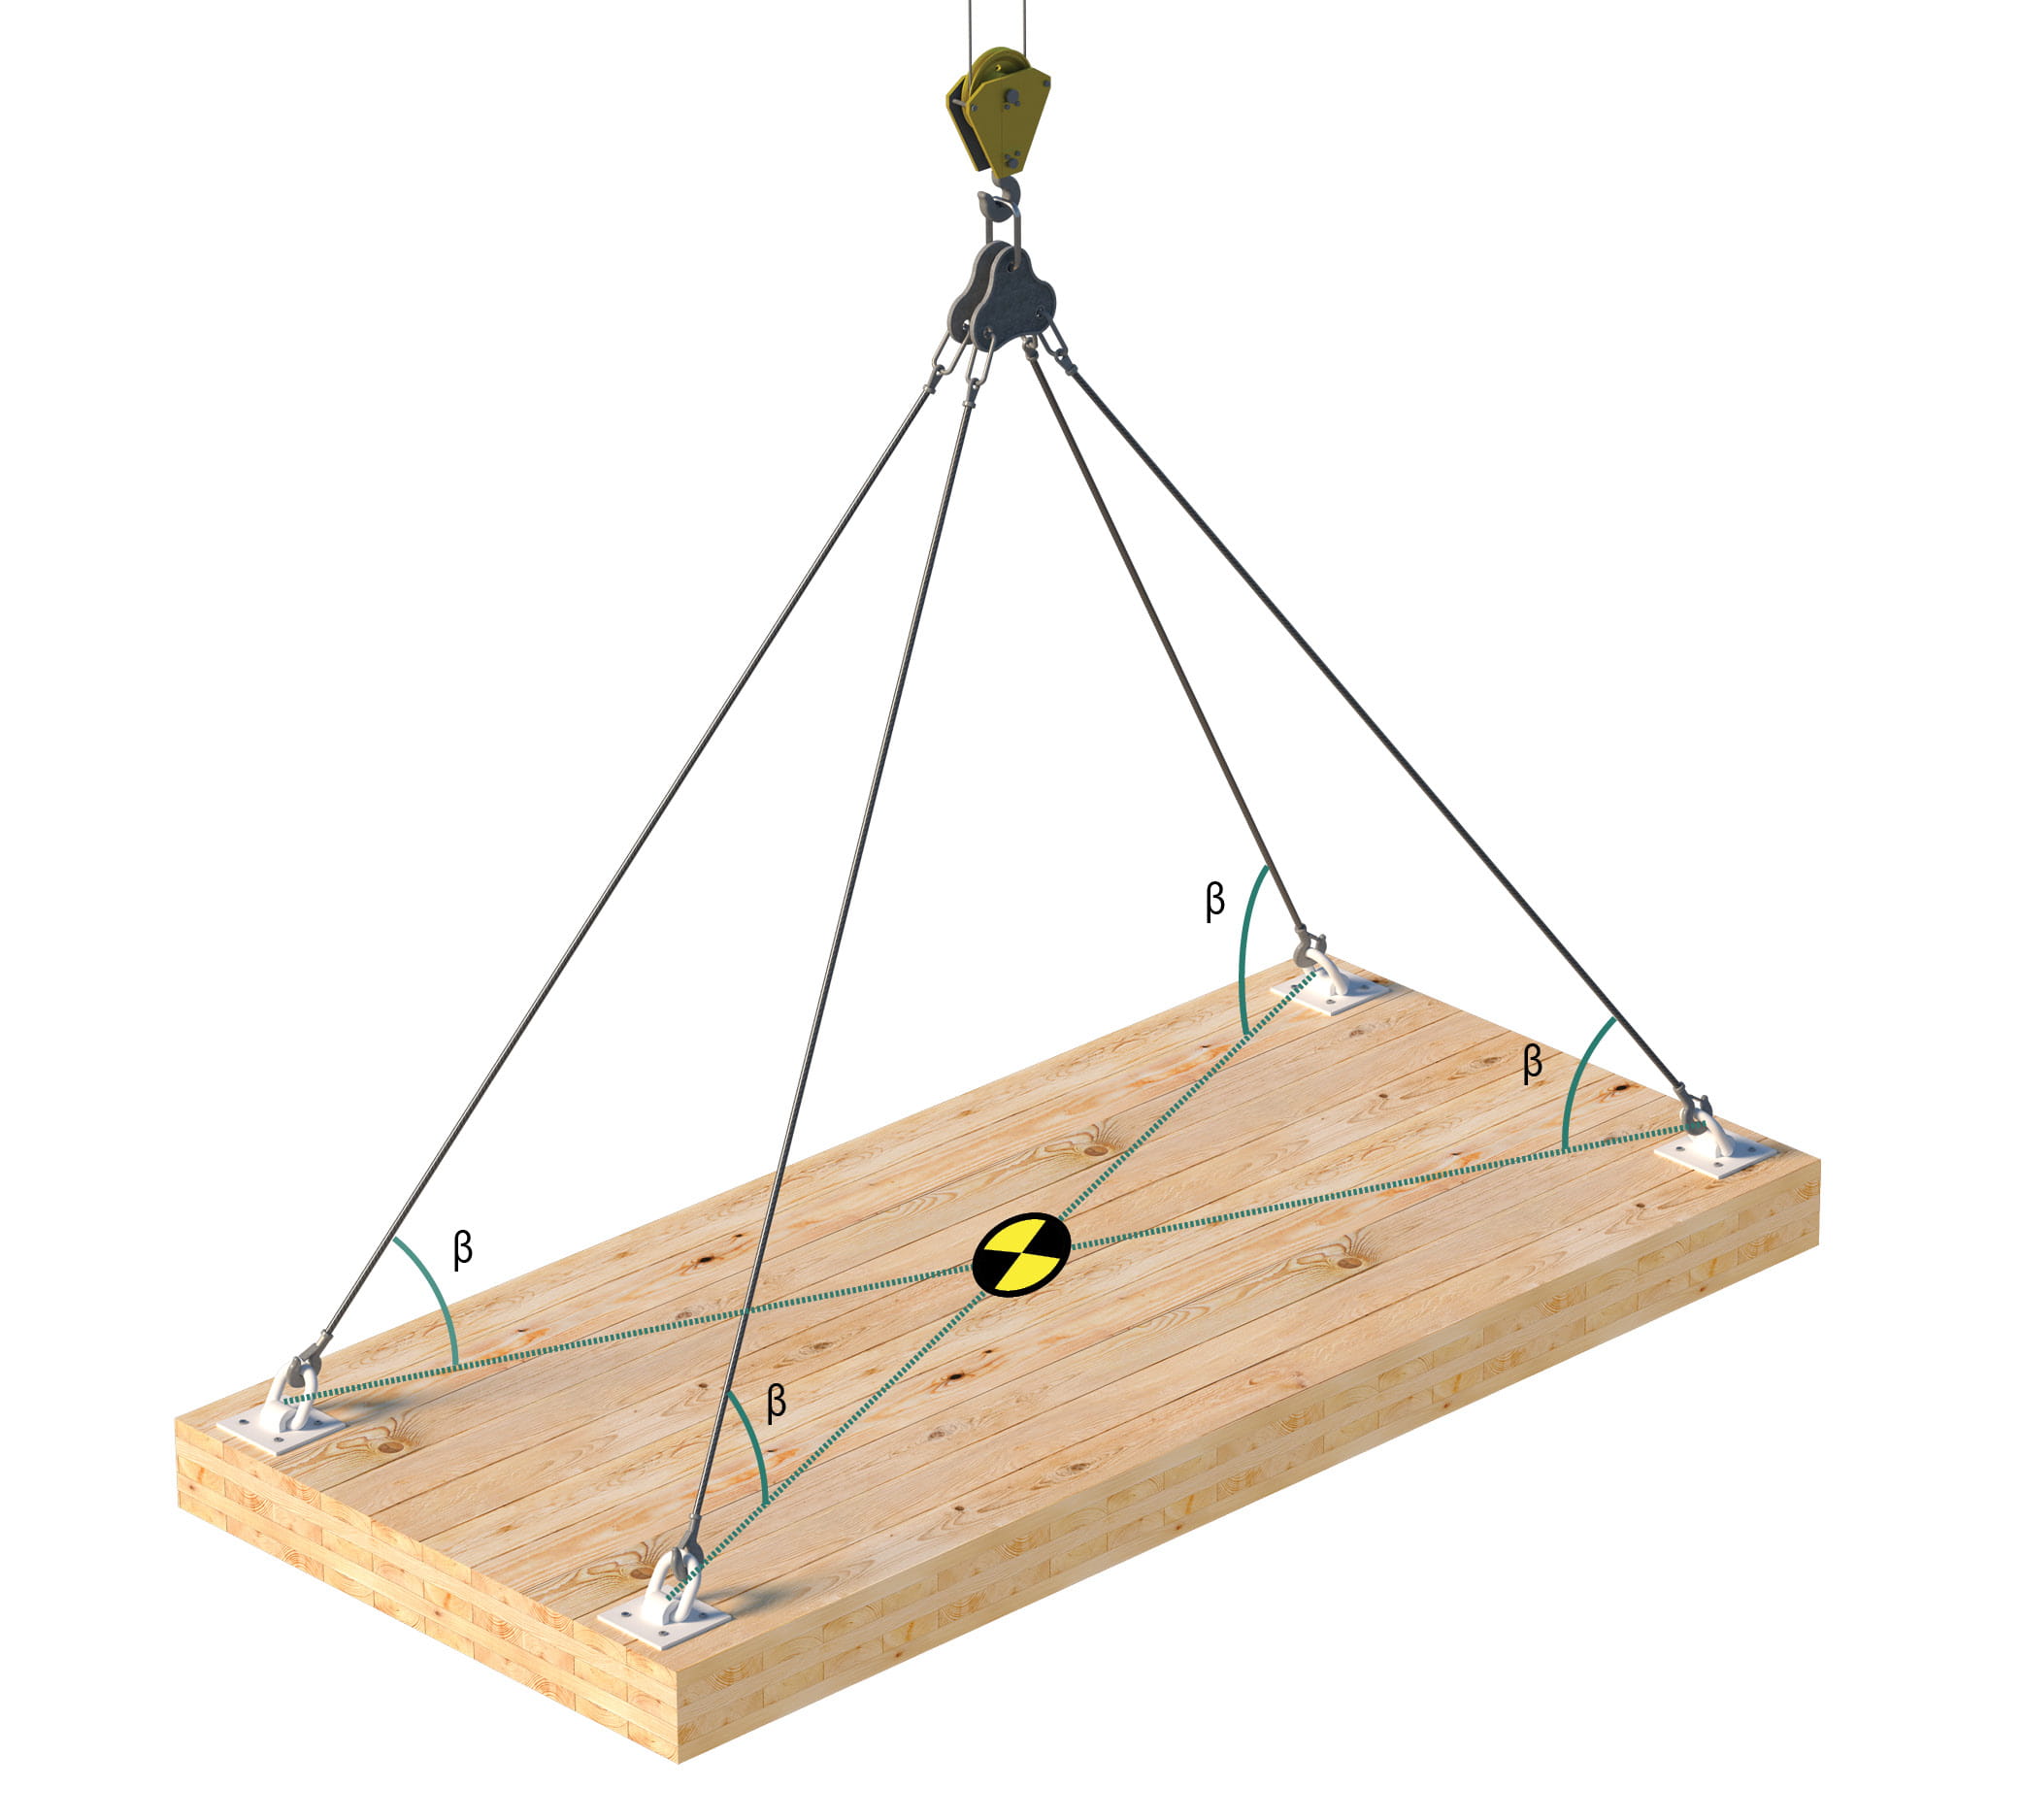
Figure 2. Rigging arrangement showing anchor locations and hook position relative to the element’s center of gravity
- Ensure all minimum end distance, edge distance, and material thickness requirements are met.
- Ensure that the anchors are arranged around the element’s center of gravity.
- Ensure that the anchor positions allow for alignment between the loads and the slings, as well as free rotation of the anchors.
(3) Rigging conditions
- Ensure anchors remain free from visible damage prior to lifting. Damage may occur during installation or transportation.
- Ensure that all slings and rigging hardware are properly connected before lifting.
- Ensure that the hook is located over the element’s center of gravity prior to lifting.
- Ensure that the sling angle, β, is equal to or greater than 60° unless otherwise noted in an approved rigging design. Smaller sling angles reduce the anchor capacity and shall be accounted for in the rigging design.
- Ensure that the installed screws match the approved rigging design by checking their heads for screw dimensions and type.
- Ensure that the screws have not been overtorqued during installation. Overtorquing can over-auger the holes, damage the timber, reduce the tension capacity of the connection, or cause screw heads to fail.
- Ensure that there is a clear line of communication between the crane operator and the rigger. Poor communication may lead to unsafe lifting conditions.
- Ensure that all loads are secured and balanced.
- Ensure that there is no live load (e.g., a person or an unsecured object) on the element during lifting.
- Ensure that no lifting is conducted over persons at any time by checking your travel path in advance.
- Use taglines where necessary to maintain control of the load during lifting.
- Ensure that the load is fully supported and properly blocked before disconnecting the rigging system after lifting.
Following these recommendations can help improve rigging safety and support safe lifting practices. For project-specific guidance or questions regarding MTC rigging devices, please contact our Technical Support Team.