
The MTC APEX beam hanger is a North American-manufactured and engineered connection system designed for beam-to-beam and beam-to-column applications in mass timber construction. It was designed to deliver a concealable high-performance beam hanger with improved installation efficiency.
It has been extensively tested to validate its structural performance, but beyond that, it was designed with installation in mind—making it both a strong and cost-effective solution for modern mass timber construction. Key advantages include enhanced installation tolerances, an optimized fastener configuration, and additional detailing features such as provisions that allow a fire-rating wood block to be installed before drop-in.
This article gives you the complete rundown on how to install the APEX family of connectors, covering general considerations, the hardware and tools necessary, installation times, and step-by-step instructions to ensure a smooth installation on site.
Approximately 9-minute read.
Hardware & Tools: What Do You Need?
Each APEX connector kit includes:
For an accurate installation, we recommend using:
And, the usual must-haves: PPE, measuring tape, framing square, and a marker.
Installation Times and Time-Saving Tips
Installation time will vary depending on site conditions and experience, but the APEX is designed to support an efficient workflow. A single person can typically install a complete APEX connection in 13 to 23 minutes, depending on the model, including:
💡 Pro tips to help streamline installation and improve consistency across multiple connections:
💡 Speaking of fit-up tolerance, APEX is engineered with enhanced tolerances that help accommodate minor misalignments during installation, allowing connections to more easily drop into place and self-align. This reduces the need for field adjustments and rework, helping crews save valuable time. Enhanced tolerances for easier fit-up and reduced rework:
Step-by-Step Installation Instructions
Before starting, if you’re not familiar with MTC Solutions fastener technology, we recommended reviewing our STS installation best practices article that details how to optimize your installation.
1. APEX Layout and Reference Points
Begin by laying out the connector on both the primary and secondary members.
The top of the member is used as the reference point, consistent with other concealed beam hanger systems. The lower nonstructural positioning screw should be measured from that point of reference.
The pocket should be at the bottom on the primary member and the top on the secondary member.
💡 Pro tip: Mark alignment points on beam faces for quick verification and layout.
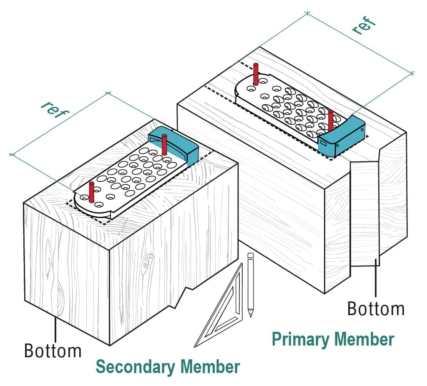
Figure 1. APEX layout reference points
⚠️ Important: When working with split lamination glulam, voids may be present between plies. Position fasteners away from these voids to ensure uniform load transfer. If it’s not possible to reposition the fasteners, consult your EOR.
2. Screw Installation Layout
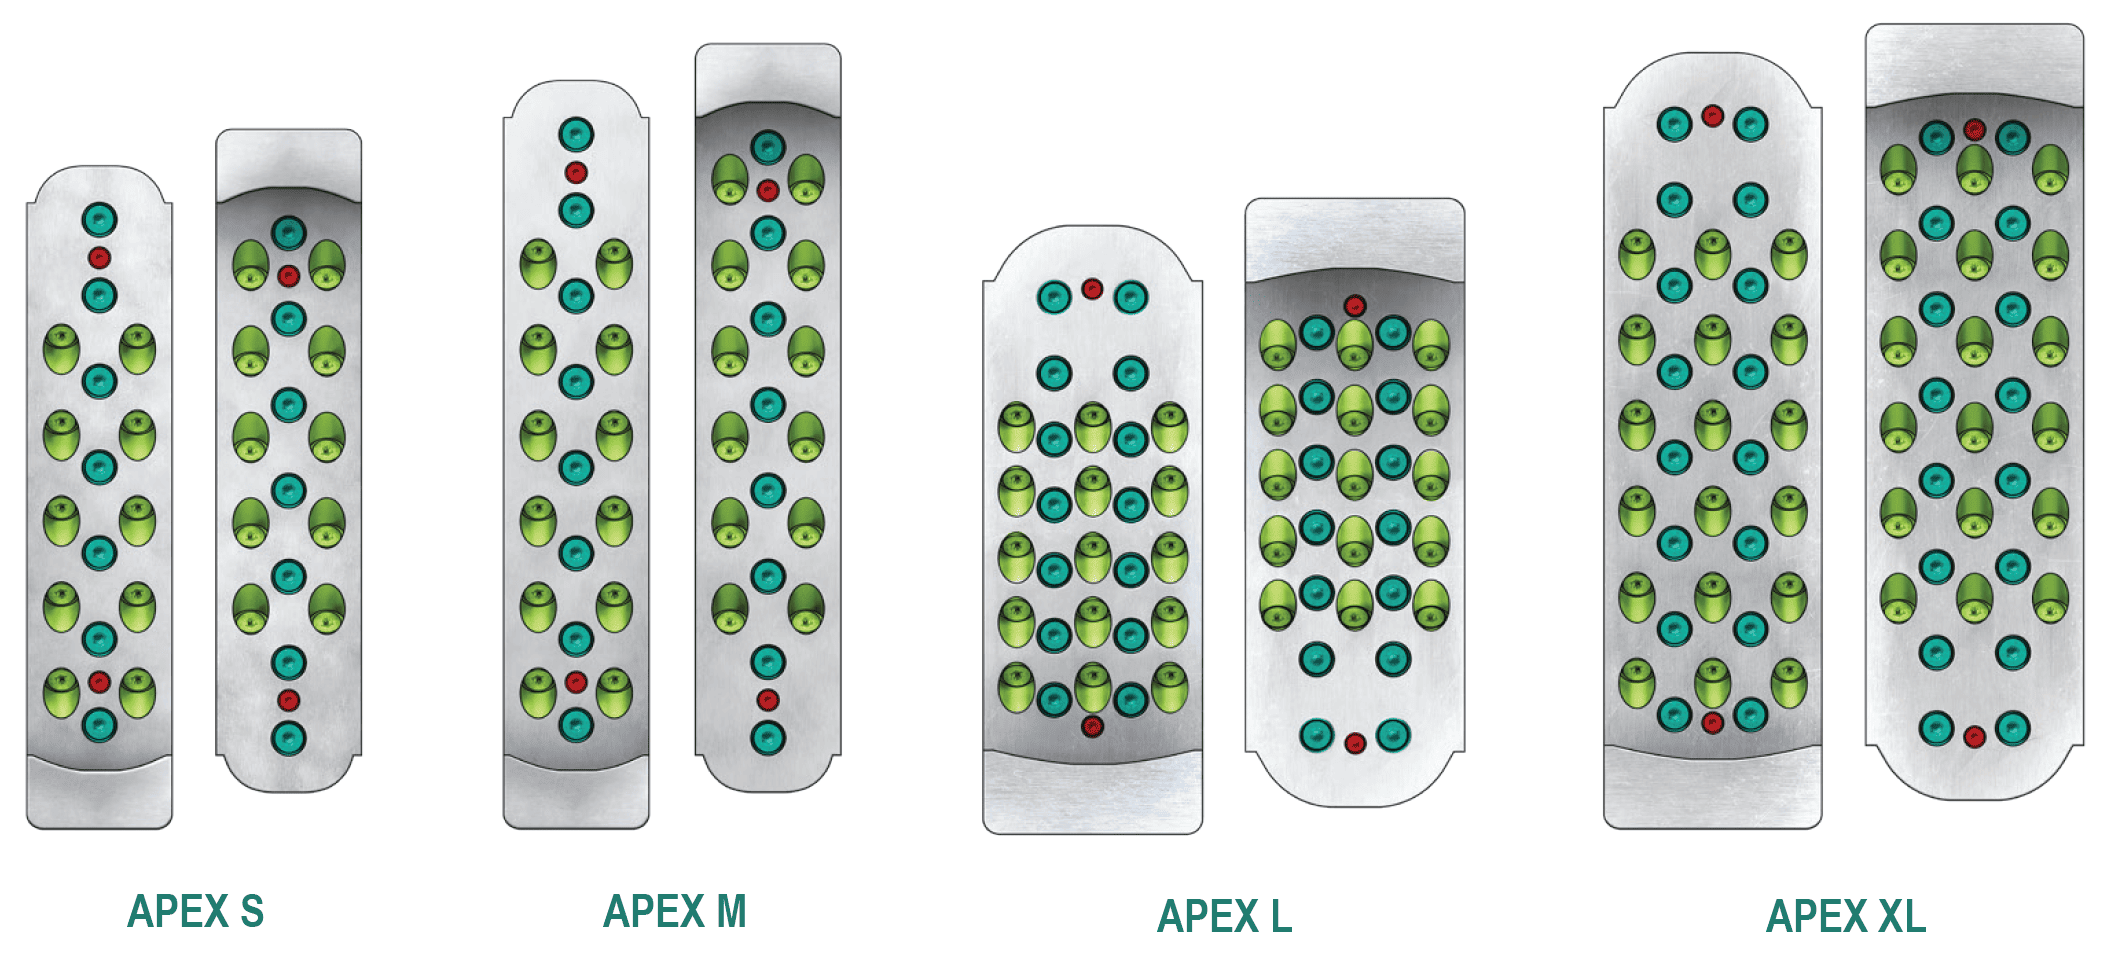
Figure 2. APEX screw patterns
Legend:
● Structural Positioning Screws
● Horizontal Screws
● 45° Inclined Screws
Start with the top screw to establish alignment, then install the bottom screw to secure the plate.
💡 Pro tip: Predrilling pilot holes for positioning screws during fabrication can improve accuracy and reduce installation time on site.
3. Pilot Holes (Recommended)
For APEX connectors, 1/4 in. [6.4 mm] diameter, 1 in. [25.4 mm] long pilot holes are recommended. The APEX predrilling jig is especially useful for maintaining the correct angle for inclined fasteners.
4. Install MTC-FTC Structural Screws
The APEX system uses a combination of horizontal and inclined screws.
Install all horizontal screws first, followed by the inclined screws. This sequence helps maintain alignment and ensures a smooth installation process.
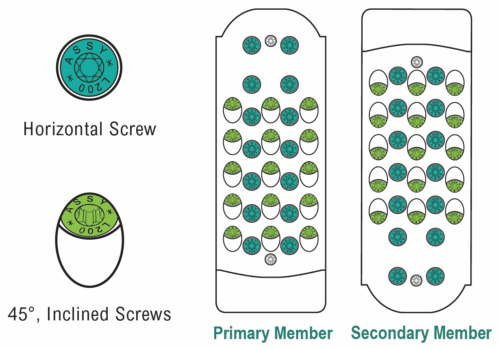
Figure 3. APEX structural screw pattern
💡 Pro tips for installation:
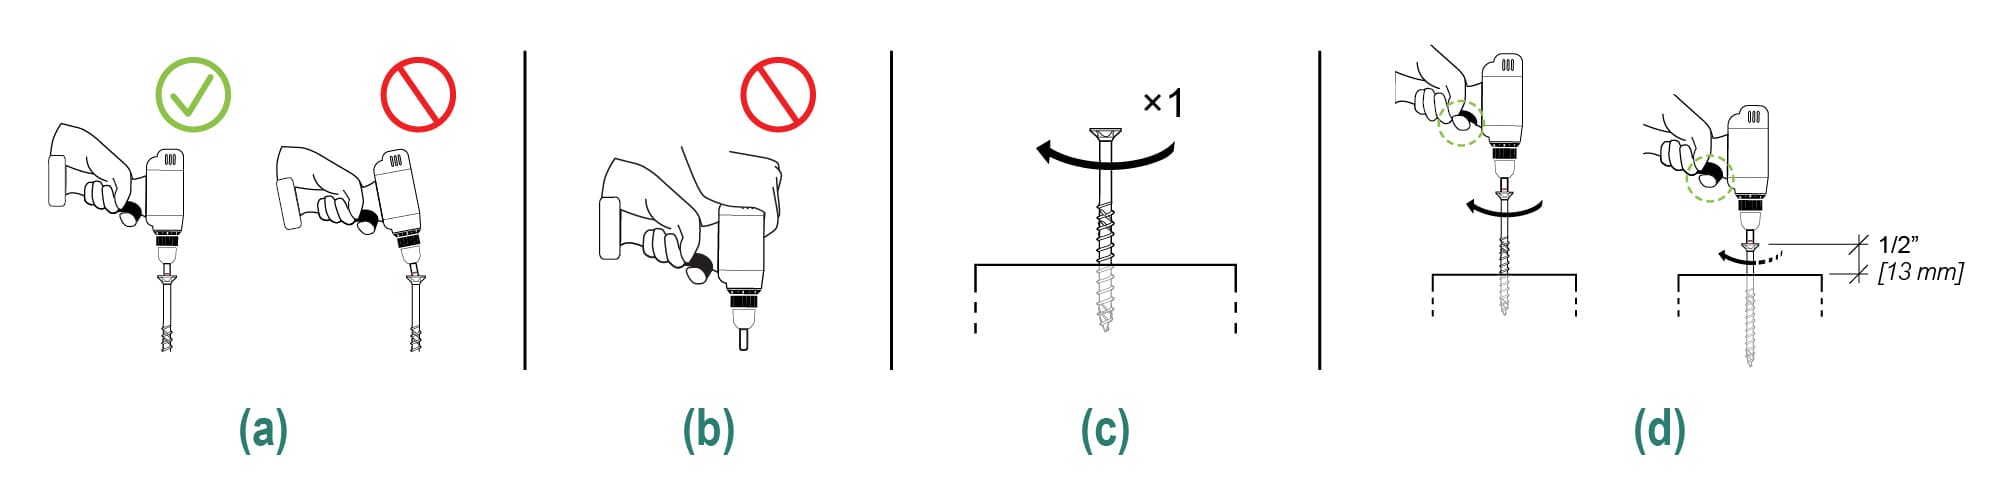
Figure 4. Screw installation best practices
5. Wood Plug Installation (Optional)
APEX includes diagonal holes that allow a wood plug to be pre-installed in the shop or on the ground on site before the secondary beam is lifted in place. This improves installation accuracy while reducing the need for overhead work at height.
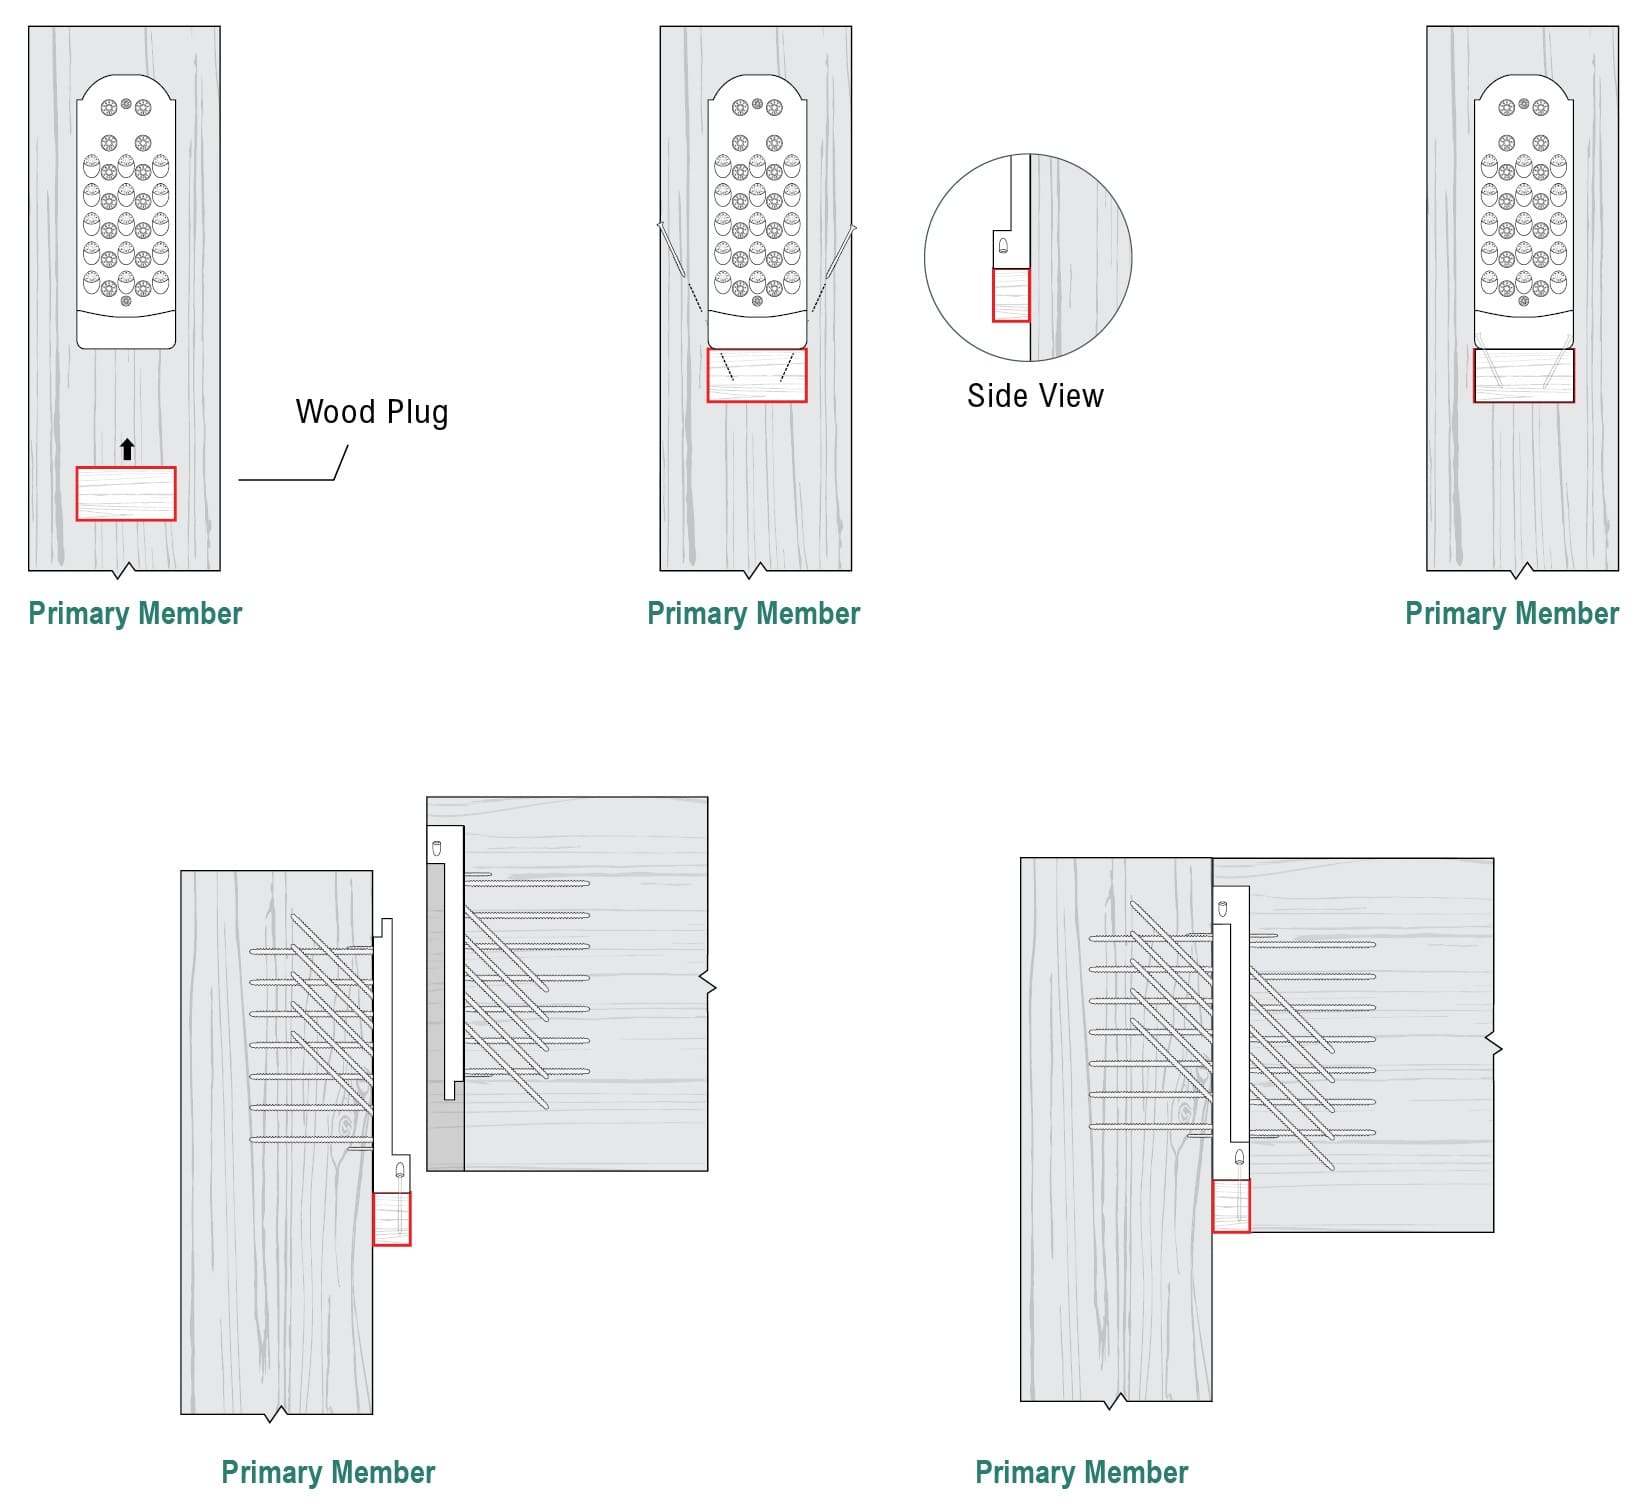
Figure 5. APEX wood plug installation steps
And that’s it! Efficient and simple.
The North American-made APEX beam hanger was designed to deliver high-performance connections with enhanced installation features, making it the strongest and most cost competitive local solution for your mass timber projects.
Under design development stage? Tap into our Resource Hub or Contact Us today! Let’s build something great together!
And if you are wondering which structural performances the APEX was tested and proven for, check out the following blog posts for an in-depth explanation:
Register for a Technical Learning Session
Sign up for MTC Newsletter and keep up to date with all our progress.